We process the highest quality turmeric right here in the Hunter Valley. Our turmeric is grown organically, free from chemical pesticides and insecticides. When we process the turmeric into a dried spice it remains in its purest form and is highly concentrated (it takes between six and seven kilograms of fresh turmeric to make one kilogram of dried spice).
To maintain the integrity of our produce we process a limited amount each year – only what we can handle. Our goal is to preserve the taste, purity, quality and benefits of this natural wonder. Please note: we do not sell turmeric as a medicinal product. Nor do we make any medicinal claims about it. For us, turmeric is food and it our food that sustains us.
A Typical Growing Year
So often we are asked how to grow turmeric. We have dedicated this page to a complete growing cycle. Turmeric is an annual that is ready for harvest in winter (July to late September).
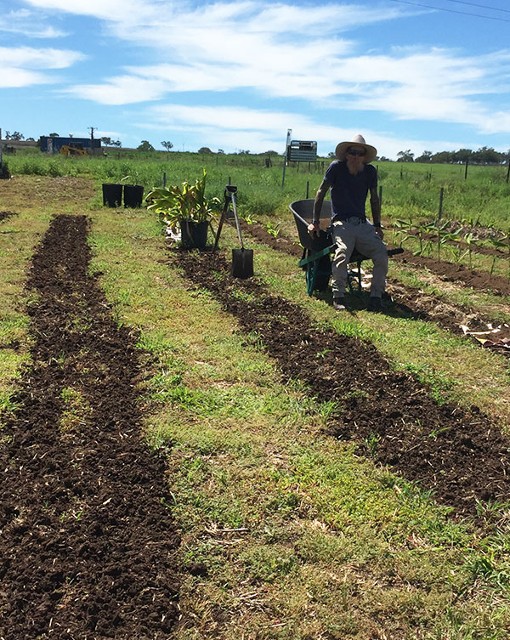
Stage 1 - Prepare and Plant
Immediately after harvest we prepare the beds and replant the pods (also referred to as mothers).
Like so many things the preparation is paramount. Good manures or organic matter, nicely aerated soils and a little bit of dampness is best.
Pods are planted 10-15cm deep and 25cm apart. We plant anywhere from June to early August (we also are harvesting during these months).
If we are short of mothers, we will use the rhizome fingers to plant. Our first crop of black turmeric came from the rhizomes (not the mothers) so it is not essential to have mothers to replant.
Stage 2 - Protect
After planting the rhizomes we cover the beds with straw (not hay). This keeps weeds down and soil moisture more evenly distributed from the surface to the rhizome. It also helps maintain a more stable soil temperature.
If we don’t add the straw at this point, we will do it later (but we always do it). This is particularly important in Merriwa where winter lasts for three months and we get frosts for a lot of that time.
Now it’s a waiting game.
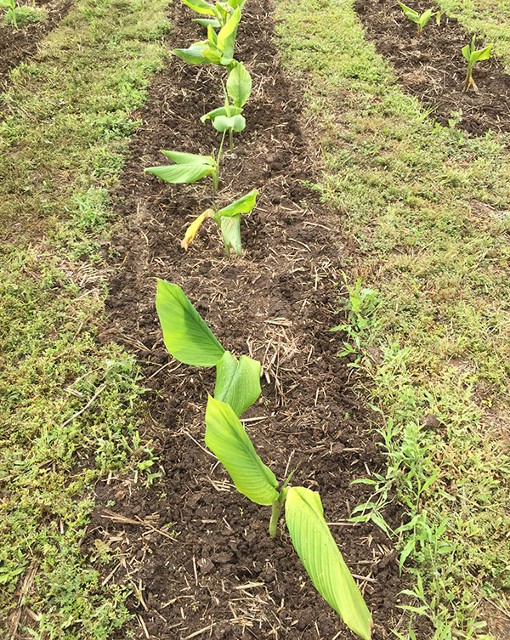
Stage 3 - Making an Appearance
The turmeric will show itself some time around October (give or take a week here or there).
It can take several months before the leaf pops out of the ground, and because there are several months between planting and the turmeric showing itself, it is easy for people to think that the turmeric has died.
This long dormancy can cause people to do two things that they should never do – they stop watering it (because they think the turmeric has died) or water it excessively (thinking they will reinvigorate the rhizome). Both these things are not good practises. Excess watering in particular can cause the rhizome to rot in the ground.
Between planting and popping out of the ground, water regularly but not excessively.
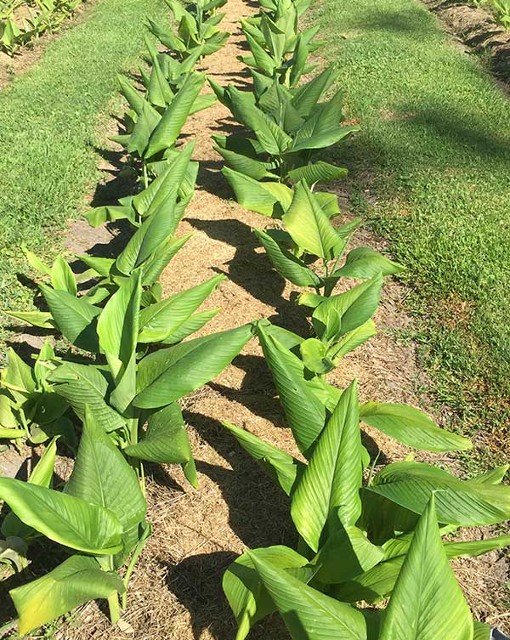
Stage 4 - Weeding and Watering
By mid summer the turmeric is well and truly out of the ground and developing nicely. This is the time to weed, weed and weed a little more.
We never let the grass grow over the turmeric beds and we spend a lot of time keeping those pesky weeds down. Imagine trying to dig up turmeric from below a bed of grass (you will only ever do it once).
At this stage it is still a waiting game. We continue to water regularly but not excessively.
And don’t forget, keep weeding.
Oh … and the other thing that will happen is you may start to see flowers on the turmeric. Some varieties have a white flower and some have a pink flower.
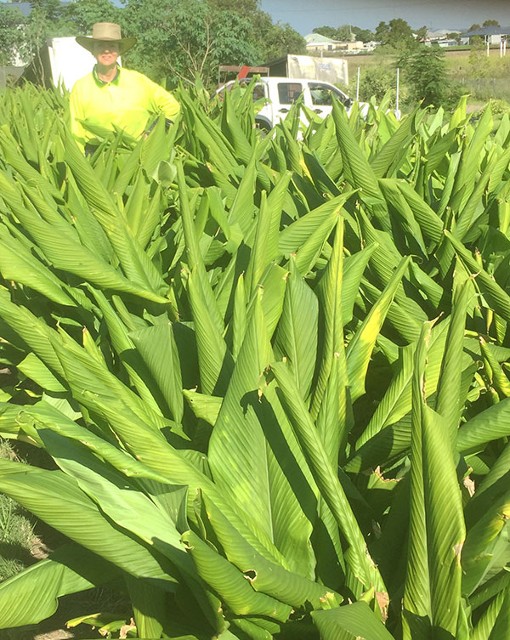
Stage 5 - Full Bloom
By March the turmeric is in full bloom. The beautiful leaves are feeding the rhizome.
The leaves can be picked and used like a banana leaf. Don’t take too many leaves though – remember they are feeding the rhizomes. The leaves can be used for wrapping food and grilling. In Indonesia they are dried and used as a herb.
You should also see the flowers in full bloom at this stage. The flowers can be hidden in the centre of the leaf cluster so you may have to poke around to see them. Not all plants will have flowers. In fact in a full row we may only see three or four flowers.
And it is still a waiting game. Nature will tell us when it is time to harvest.
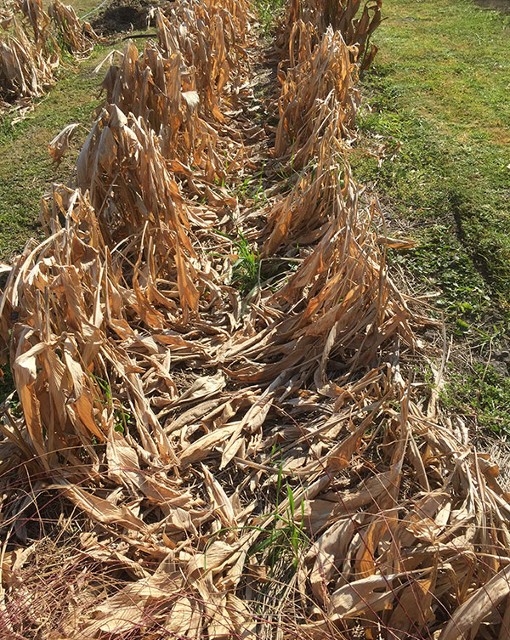
Stage 6 - Pre-harvest
We must never panic when, somewhere around May, the leaves start to yellow around the edges. This is nature telling us to get ready because harvest is just round the corner. The yellowing turns to a brown colour and eventually the entire leaf dies off. This happens in winter and it is nature’s way of saying “harvest time is upon us”. We test the readiness by pulling on the leaf. If some of the leaves are starting to separate easily from the rhizome, we can start to harvest Now here’s the trick … don’t go clearing all the leaves away from the rhizome before harvesting because the leaves tell you where to dig for the rhizome.
Grab the turmeric while the leaves are still there so they guide you as to where you need to dig.
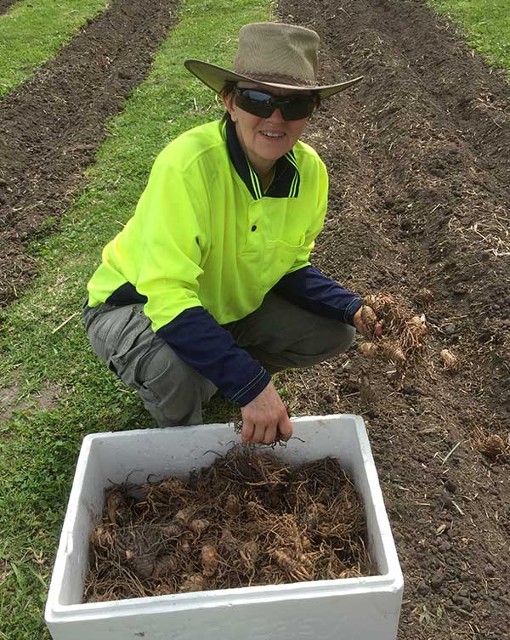
Stage 7 - Harvesting
Yes, it’s that time again … harvest!
This is the best time! The winter sun warms us. The dirt is hopefully crumbly and dry and falls away from the rhizome with ease. We try to leave as much soil behind as possible so we are not removing our precious black volcanic soil.
After a light wash, the product is ready for market or processing.
We sell our harvest fresh at markets over June, July and August (and sometimes into September if we are a bit behind in the harvest) and we process a certain amount into a range of products including a spice powder, capsules, pickled turmeric and golden paste.